Dartboard Setup Guide 2026: Measurements, Mounting and Lighting
Plenty of beginners wonder whether a home darts setup can be quiet enough for a flat, spare room or shared house.
If you build your darts setup properly from the start, you get more control, a better feel for your throw and far more consistent grouping.
Want to hang a dartboard at home but not sure about the height, distance, oche or lighting? No problem. This guide takes you through the setup step by step, with a checklist and the common beginner mistakes to avoid.
Important: This guide is for steel tip darts with a sisal dartboard. If you play soft tip or electronic darts, the throwing distance can vary depending on the board or rules. I will cover that below.
Contents
- 1) Official measurements: height and distance
- 2) Step by step: how to install your dartboard properly
- 3) Lighting and wall protection: when are they worth it?
- Dartboard soundproofing for flats and quieter play
- 4) Beginner accessories: what you actually need
- 5) Setup recommendations
- Which darts setup is right for you?
- 6) Common setup mistakes
- 7) Setup checklist
- 8) Frequently asked questions
- More guides and comparisons
- Official rules and organisations
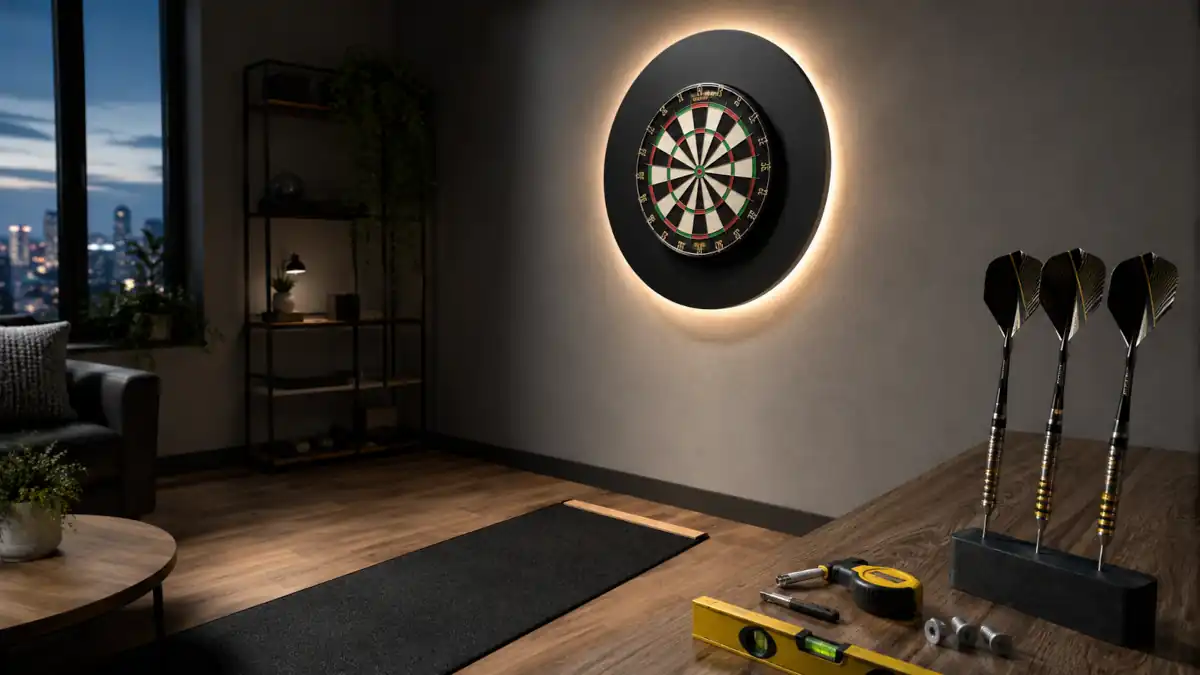
1) Official measurements: height and distance for steel tip and soft tip darts
A home darts setup should be built to the correct measurements right from the start. If you practise from the wrong distance, you build the wrong habits. And fixing that later is a proper pain.
Bullseye height: 1.73 m from the floor to the centre of the bull.
Throwing distance: 2.37 m from the front face of the board to the oche line.
Diagonal bull to oche: 2.93 m, handy for quick measuring.
Bullseye height: usually also 1.73 m.
Throwing distance: often 2.44 m, but it depends on the machine and rules.
If you are starting out at home with a sisal board, use the steel tip distance: 2.37 m. That is the setup most home players need.
A quick word from me:
Of course I would like you to buy through DartWorldHub. But only if this setup actually suits you. If it does not help, there is no point selling you shiny nonsense.
2) Step by step: how to install your dartboard properly
- Choose the wall carefully: solid is best. Brick or concrete is ideal. If it is plasterboard, use proper fixings and do not wing it.
- Mark the bull height: measure 1.73 m from the floor and mark the point.
- Fit the bracket: screw the bracket into the wall properly. A decent fixing kit makes life easier.
- Hang the board: the bull should sit exactly on your height mark.
- Level the board: use a spirit level or dartboard leveller so the 20 sits bang on top.
- Mark the oche: measure 2.37 m from the front face of the board, or use the 2.93 m diagonal from the bull.
- Throw a quick test: chuck 9 relaxed darts. If everything feels oddly close or far away, the line is often wrong.
Beginner tip: measure twice. A couple of centimetres wrong can feel weird very quickly.
When your darts setup is installed properly, you throw from the same place, see the board clearly and stop fighting problems that have nothing to do with your aim.
3) Lighting and wall protection: when are they worth it?
Good lighting is not just there to look fancy. It removes shadows, improves visibility and helps you aim more consistently. If you play in the evening or in a normal spare room, a proper ring light can change the whole setup.
A surround protects the wall when you miss the board. For beginners, it is almost essential unless you are trying to turn the wall into Swiss cheese.
A dart mat protects the floor and your points, while also giving you a clear throw line. If you play on tiles, laminate or wooden flooring, do not overthink it.
Plenty of players only realise later how much a clean setup matters. When height, distance, light and protection are sorted from the start, you can concentrate on building a repeatable throw.
Dartboard soundproofing: the underrated upgrade for quieter home darts
Many beginners hang their dartboard straight on the wall. It works, yes. But every dart impact travels into the wall, and in a flat that can be louder than you expect.
The solution: fit a soundproofing board or damping system behind the dartboard first, then mount the board onto that.
What does it actually do?
- Less impact noise
- Less vibration through the wall
- Better for flats, shared houses and family homes
- Often gives the board a more stable base too
When is it worth it?
- If you play in a flat
- If you practise in the evening
- If the wall vibrates when the darts hit
- If you want a more serious home setup
Practical tip: a lot of players only realise how noisy their old setup was after they install soundproofing.
You will find suitable options in the setup table below.
Darts setup in a flat: how to play quieter without annoying everyone
Lots of players screw the board straight to the wall and then wonder why it sounds loud or why the wall vibrates. That is normal. Every impact sends sound and vibration into the structure.
The aim: you mainly want two things in a flat: less noise and less vibration. That works best when the board is isolated from the wall rather than mounted directly against it.
Three things that actually help
This is a board or backing plate you fit to the wall first. Then the dartboard goes on top. It cuts down the vibration going into the wall.
Mainly protects the wall from stray darts, but it also stops missed darts hitting the wall directly.
Protects the floor and softens the noise when darts drop. It also keeps your throw line clear.
When is soundproofing really worth it?
- If you play in a flat
- If you throw at night
- If the wall is thin or carries sound
- If you want to avoid grief from neighbours or family
Practical note: soundproofing will not magically give you more 180s, but it can let you practise without constantly thinking about the person next door.
In the table below, you will find products for soundproofing, wall protection and floor protection.
4) Beginner accessories: what you actually need
To play properly from day one:
- Sisal dartboard
- Wall bracket or fixing kit
- Oche line or dart mat
- Dartboard surround / wall protection
Makes home darts much better:
- Shadow-free dartboard lighting
- Dart mat for floor protection
- Spirit level or dartboard leveller
Nice to have, but not urgent:
- Dartboard cabinet
- Soundproofing system
- Laser oche if you do not want a fixed line
⏱️ Quick check & availability
Amazon stock changes all the time. Certain models, colours or bundles can disappear quicker than you expect. If a link shows as unavailable, check another variant or come back later. And if you spot an old or broken link, you can send us a quick message.
5) Dart setup recommendations 2026 – comparison table including soundproofing
| Category | Product | Why it makes sense | Best for | Where to buy |
|---|---|---|---|---|
| Dartboard | WINMAU Blade 6 Triple Core | Very durable, premium construction and fewer bounce-outs. Ideal if you practise a lot. | Everyone | |
| Winmau Blade 6 Dartboard – Professional – with Rota Lock System – Blade 6 Triple Core Carbon | Winmau Blade 6 Dartboard – Professional – with Rota Lock System – Blade 6 Triple Core Carbon | Good-value alternative to the Triple Core, with a familiar board feel. | Beginners and improving players | |
| Mission Dartboard Surround – Pro – Heavy Duty – with Logo – Red | Mission Dartboard Surround – Pro – Heavy Duty – with Logo – Red | Protects the wall when you miss. Makes home practice a lot less stressful. | Beginners | |
| Soundproofing | Karella Sound Insulation | Wall → damping layer → board: less vibration and less impact noise. | Flats | |
| Shot Stadium Dartboard Lighting System – 4 Floodlights | Shot Stadium Dartboard Lighting System – 4 Floodlights | Feed-verified choice for Shot Stadium dartboard lighting. | Evening / home | |
| Viper Laser Dart Line – Throw Line – Adjustable – Laser Beam Oche – Black | Viper Laser Dart Line – Throw Line – Adjustable – Laser Beam Oche – Black | Cheap, clear throw line. Better than guessing your distance every session. | Minimum setup | |
| Bull’s NL Advantage Carpet Dart Mat – with oche – Black & Gold – 300 x 85cm | Bull’s NL Advantage Carpet Dart Mat – with oche – Black & Gold – 300 x 85cm | Feed-verified choice for carpet dart mat with raised oche. | Flat / home | |
| Ruthless Dartboard Bracket – Easy Rotate – Wall Mounting – includes Fixings – Black | Ruthless Dartboard Bracket – Easy Rotate – Wall Mounting – includes Fixings – Black | Useful if your old bracket is missing, loose or just a bit rubbish. | Fixed setup | |
| Mission Dartboard Stabiliser Kit – Adjustable Levelling System | Mission Dartboard Stabiliser Kit – Adjustable Levelling System | Helps you level the board quickly so the 20 is exactly where it should be. | Everyone | |
| Mission Dartboard Cabinet – Deluxe Quality – Plain Black | Mission Dartboard Cabinet – Deluxe Quality – Plain Black | Makes the setup look cleaner and gives the board a tidier finish for a home setup. | Living room / games room |
Which darts setup is right for you?
If you are not sure yet, keep it simple and use these rules:
My take: if you plan to play long term, a good board is worth it. Cheap boards often age faster, and that is when the bounce-outs, ugly holes and swearing start.
If the exact WINMAU Pro-Line Dartboard Surround is not available, Dartboard Set: Mission Samurai II Dartboard + Pro Surround + Throwline + 6 Darts is a sensible Darts Corner alternative for the same purpose.
6) Common dartboard setup mistakes and how to avoid them
Fix: bull exactly at 1.73 m. Not “near enough”.
Fix: 2.37 m from the front face of the board to the oche, or 2.93 m diagonally from the bull.
Fix: use ring lighting or place your lighting properly. Shadows wreck consistency.
Fix: surround and mat. They prevent wall and floor damage and save hassle.
Fix: same throw line, same lighting, same stance. That consistency makes changes in your throw easier to assess.
7) Setup checklist in 2 minutes
- ✅ Bull height: 1.73 m
- ✅ Steel tip distance: 2.37 m from the board face
- ✅ Board level: 20 at the top, straight and centred
- ✅ Oche visible: throw line or dart mat
- ✅ Lighting: no annoying shadows
- ✅ Surround: wall protected
- ✅ Floor protected: optional, but very useful
A beginner darts setup does not need to be complicated. Use the right measurements, add the right accessories and you have a stable home setup for proper practice.
8) Frequently asked questions about dartboard setup
What height should a dartboard be?
For steel tip darts, the centre of the bullseye should be 1.73 m from the floor.
How far from the dartboard should you stand for steel-tip darts?
The official distance is 2.37 m from the front face of the dartboard to the throw line. You can also measure 2.93 m diagonally from the bull to the oche.
Do beginners really need a dartboard surround?
Yes, unless you do not care about your wall. Beginners miss outside the board more often than they expect, and a surround helps prevent wall damage and saves hassle.
What lighting is best for a dartboard?
A ring light around the board is usually the easiest option because it reduces shadows and lights the board more evenly.
Dart mat or oche line?
An oche line is enough as a minimum. A dart mat is more practical because it protects the floor, protects your points and marks the distance at the same time.
More guides and comparisons on DartWorldHub
If you want to improve your setup step by step, these guides are the next logical move.
- Accessories 2026 Dart Accessories Comparison → What actually helps your setup and what just takes up space.
- ✅ Beginner gear Dart Accessories for Beginners → Essential gear versus stuff that can wait.
- ️ Wall protection 2026 Dart Surround Comparison → Protect your wall before missed darts turn it into a crime scene.
- Lighting 2026 Dartboard Lighting Guide → Shadow-free systems for a cleaner board view.
- Dart mat 2026 Dart Mat Comparison → Floor protection, oche markings and better home practice.
- Dartboard 2026 Dartboard Comparison → How to choose a proper sisal board without buying blind.
- Full setup 2026 Dartboard Set Comparison → All-in-one bundles for beginners and home players.
- Scoring Steel Tip Scoring Systems & Autoscoring → Less counting in your head, more focus on your throw.
Official darts bodies & useful sources
If you want to look past the gear and into the official side of darts, these sources cover professional events, UK darts organisations, rankings, tournaments and the wider international game.
- Professional darts Professional Darts Corporation (PDC) → The main professional stage for darts: events, schedules, scores, tickets, players and PDC tour news.
- World darts World Darts Federation (WDF) → The international darts federation, with world events, member nations, rankings, players and competitions.
- England England Darts → The official governing body for darts in England, covering national teams, world-ranked events and the English darts structure.
- Scotland Scottish Darts Association → Scottish darts news, competitions, national teams and tournament information from the Scottish darts scene.
- Wales Welsh Darts Organisation → The governing body of darts in Wales, covering Welsh national teams, competitions and world-ranking events.
- Ireland Irish National Darts Organisation (INDO) → Official Irish darts information, events and news from the Irish National Darts Organisation.
- United States American Darts Organization (ADO) → A useful source for US darts, rankings, approved tournaments, national events and American darts news.
- North America Championship Darts Corporation (CDC) → North America’s professional steel-tip darts tour and one of the key routes towards bigger PDC-stage opportunities.